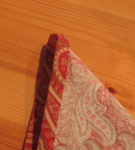
Fall napkins with mitered corners - tutorial
Yesterday there was talk of Thanksgiving and what our plans will be. My mind immediately went to these fall napkins that I made about 4 years ago as a gift. (please excuse my crummy photos from years ago)
This is the fabric I used.
The first thing to do is cut the fabric into exact squares. I chose to make 20" napkins, so my squares need to be 21 1/4". You can cut 2 napkin squares out of 1 width of fabric. You will need to decide how many napkins you want, and buy yardage accordingly. I made 12 napkins so I needed enough yardage to fit 6 napkins (127 1/2"). That means that I need to buy 3 2/3 yards (132" - there will be a bit extra). The fabric is folded in half so I will really have enough for all 12 napkins.
Fold 1/4" in on all four sides and press.
Fold the napkin at a diagonal like this.
Make a triangle pattern out of card stock. The width of the short side of the triangle will be the width of the hem. I want my hem to be 1" so my triangle measures 1" on the short side.
Match up the triangle pattern to the folded corner of the napkin and mark with a pencil.
Stitch on the pencil line.
Trim the seam at 1/4". To avoid the tread tails from coming out exactly in the corners, I started and stopped my stitching off of this inside corner. That way when I topstitch the hem in place, the tails will be neatly tucked inside the hem.
Mass production time. Do this 47 more times. You will be a pro!
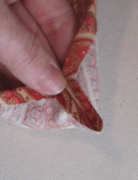
Turn each corner inside out.
Then top stitch.
Beautiful perfect mitered corners
Stack them all up, and wait for Thanksgiving to arrive.
Don't forget to make a matching table topper.
Enjoy your holidays!


Comments
Post a Comment